
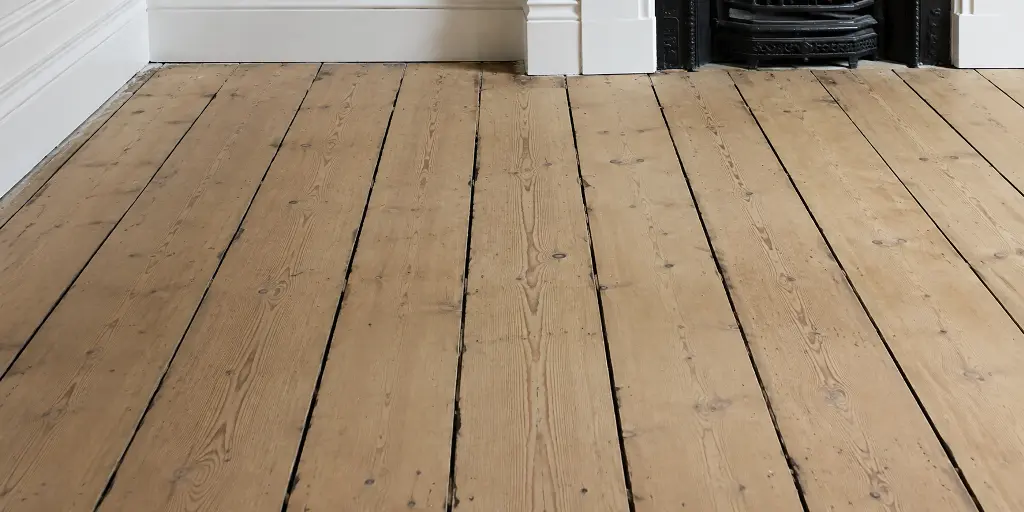
There are four practical ways to deal with gaps in a wooden floor, and the right one depends almost entirely on how wide the gaps are and whether the boards are still moving. Fine gaps are filled with a resin filler mixed with sanding dust from the floor itself. Wider gaps are best filled with wooden fillets — thin slivers of timber glued and driven in, then sanded flush. Very wide or irregular gaps often point to boards that need lifting and re-laying or replacing. And where the aim is purely to stop draughts rather than to tidy the floor’s appearance, a flexible rope-type filler or insulation between the joists can be the more sensible answer.
Filling gaps is not automatically the right move, either. On a floor that still moves seasonally, filler cracks and pops out within a year or two. That’s why it’s assessed floor by floor rather than added to every quote as standard.
Gap filling appears on the published price list as a separate item, with different rates for resin filler and for wooden fillets. Both are shown as “from” guide prices because the work is priced on the linear extent and width of the gaps, not just the room size.
Why floorboards develop gaps
Original pine and Douglas fir boards in Victorian, Edwardian and interwar London houses were often laid green or semi-seasoned and have been shrinking ever since. Decades of central heating have accelerated it. Add to that:
- Boards lifted and badly refitted after plumbing, electrical or heating work — a common cause of uneven, wide gaps in one strip of the room.
- Cut nails working loose, letting boards shift sideways.
- Previous sanding that has rounded the board edges, making existing gaps look wider than they are.
- Seasonal movement, where gaps visibly close in a damp summer and open again once the heating goes on.
That last point matters more than anything else when choosing a method. A floor that opens and closes by a couple of millimetres each year will reject a rigid filler.
The four options
- Resin filler mixed with sanding dust
Best for: fine, consistent gaps — roughly up to 4–5mm — on floors that are stable and well fixed.
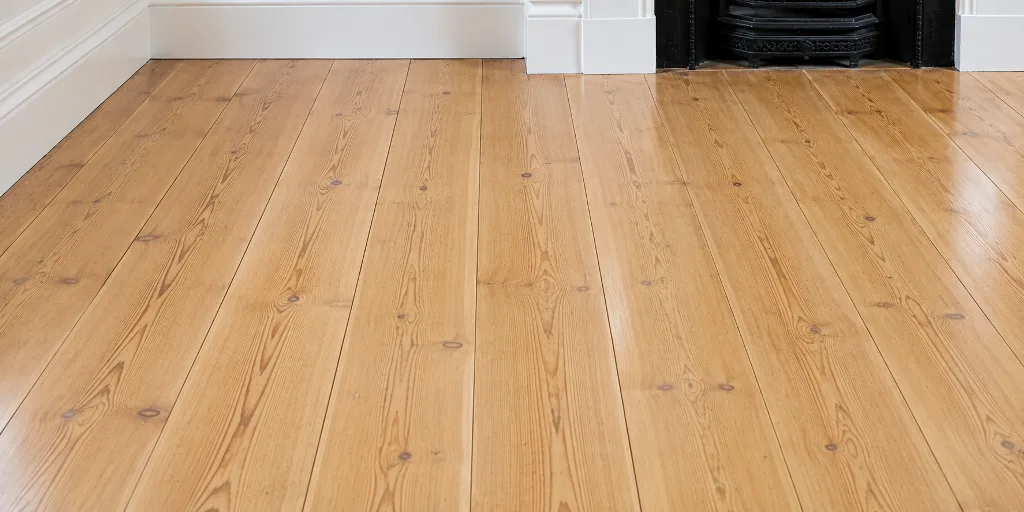
The filler is mixed with dust taken from sanding your own floor, so the colour follows the timber rather than sitting against it as an obvious line. It’s applied across the floor and worked into the gaps, then sanded back with the final grits so it finishes flush.
It’s the neatest-looking option on a floor with even gaps, and it is carried out as part of the sanding sequence, which keeps the cost down. The limitation is movement: resin has some flexibility but not much. On boards that shift, hairline cracks can appear along the fill lines, and on very wide gaps the filler has too little to grip.
- Wooden fillets (slivers)
Best for: wider gaps, typically 5mm and above, and for floors where a long-term result matters more than the lowest price.
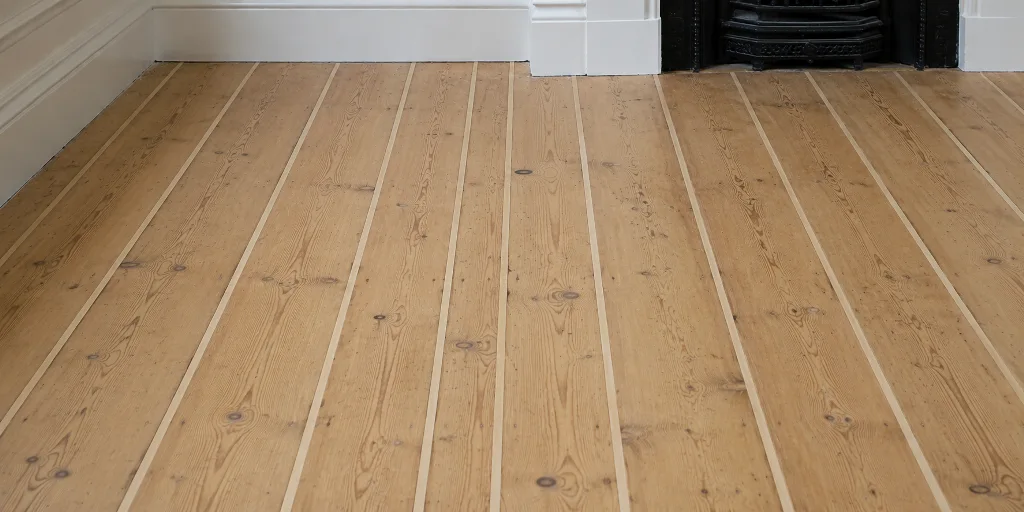
Thin strips of timber are cut to match the board species where possible, tapered, glued and tapped into each gap, then planed and sanded flush. Once finished and sealed, a well-cut fillet reads as part of the floor.
This is slower, hands-on work and it’s priced accordingly, but it is much more durable than resin in wide gaps and it copes far better with a floor that moves a little. It also adds a small amount of structural tightness across the boards. On floors where gaps vary widely, fillets and resin are sometimes used together — fillets in the wide runs, resin for the fine remainder.
- Flexible rope or foam-type gap filler
Best for: stopping draughts, especially where the floor is not being sanded and refinished.
A compressible rope or foam strip is pushed down into the gap, sitting slightly below the surface. It moves with the boards, so it does not crack, and it can be removed later if boards need lifting.
The trade-off is appearance. Even in a dark tone, it reads as a line in the gap rather than as filled timber, and it is not sanded flush. It’s a reasonable option for a floor you’re keeping as-is and want less draughty, and a poor one if the goal is a seamless restored finish.
- Lifting, re-laying or replacing boards
Best for: floors where the gaps are the symptom rather than the problem.
If boards have been repeatedly lifted and refitted, cut short, or laid with 10mm-plus gaps throughout, filling every one is expensive and rarely looks right. Lifting the floor and re-laying it tight — closing the accumulated gaps and making up the shortfall with reclaimed boards at one edge — often gives a better result for comparable money. Split, woodworm-damaged or badly patched boards are replaced at the same time.
This is also the point at which any problem underneath the floor gets dealt with — loose joists, inadequate support, or previous notching for pipework.
Which method suits which floor
| Situation | Usual approach |
| Fine, even gaps; floor being sanded anyway | Resin filler with sanding dust |
| Gaps above roughly 5mm; stable boards | Wooden fillets |
| Mixed gap widths across one room | Fillets in wide gaps, resin for the rest |
| Floor moves noticeably between seasons | Fillets, or flexible rope filler |
| Draughts only; no sanding planned | Rope or foam filler, or insulation below |
| Wide gaps throughout; boards previously butchered | Lift and re-lay, with replacement boards |
| Parquet blocks with fine gaps | Resin filler, assessed for movement first |
Situation Usual approach Fine, even gaps; floor being sanded any way Resin filler with sanding dust Gaps above roughly 5mm; stable boards Wooden fillets Mixed gap widths across one room Fillets in wide gaps, resin for the rest Floor moves noticeably between seasons Fillets, or flexible rope filler Draughts only; no sanding planned Rope or foam filler, or insulation below Wide gaps throughout; boards previously butchered Lift and re-lay, with replacement boards Parquet blocks with fine gaps Resin filler, assessed for movement first
Gap filling is not the only answer to a cold room
A lot of enquiries about gaps are really enquiries about draughts and heat loss. Filling from above helps, but on a suspended timber floor the larger gain usually comes from insulating between the joists — the boards are lifted, insulation is fitted and supported between the joists, and the floor is reinstated. It also addresses the gaps at the perimeter and around pipework that surface filling never reaches. There’s more on how that works on the thermal insulation page, and the equivalent acoustic insulation approach for noise between flats.
One important caution: suspended timber floors need ventilation underneath to stay dry. Airbricks in the external walls must be kept clear, never blocked or rendered over in pursuit of a warmer room. Sealing a suspended floor tight while cutting off the airflow beneath it invites damp and rot in the joists — a far more expensive problem than a draught.
When gap filling should wait
Hold off, or get the floor assessed first, if any of the following apply:
- Boards feel springy, or move underfoot near the middle of the room.
- There are signs of damp, musty smells, or dark staining on the board edges.
- Gaps have appeared or widened noticeably in the last twelve months.
- Boards have cupped — raised at the edges, dished in the middle.
- You can see daylight or feel strong airflow at the skirting line as well as between boards.
Each of these points at something below the surface. Filling on top of it wastes the work.
Doing it yourself
Pushing rope filler into gaps is a reasonable weekend job. Resin filling is not, in practice, a standalone task — it’s mixed with dust from the sanding process and sanded back with the floor, so it only makes sense as part of a full sand and seal. Fitting fillets by hand is achievable but slow, and cutting them to a consistent taper without a bench setup takes longer than most people expect.
Two things to avoid: ordinary decorator’s filler and any general-purpose flexible sealant. Both shrink, discolour, and reject stains and finishes, leaving pale or dark lines that show through the final coat and can only be dug out and redone.
Get your floor assessed
If your floorboards are draughty, gappy or uneven and you’re not sure which approach makes sense, we’ll look at the floor, explain the realistic options and price them clearly. Send room dimensions and a few photographs — including a close-up alongside a tape measure across the gaps — or arrange a visit for a free, no-obligation quote and professional advice.
The Natural Floor Co. — wooden floor restoration specialists, London 216 Chapter Road, London NW2 5NB · 020 8830 1455 The Natural Flooring Company. Wooden floor restoration in London · Contact us
Frequently Asked Questions